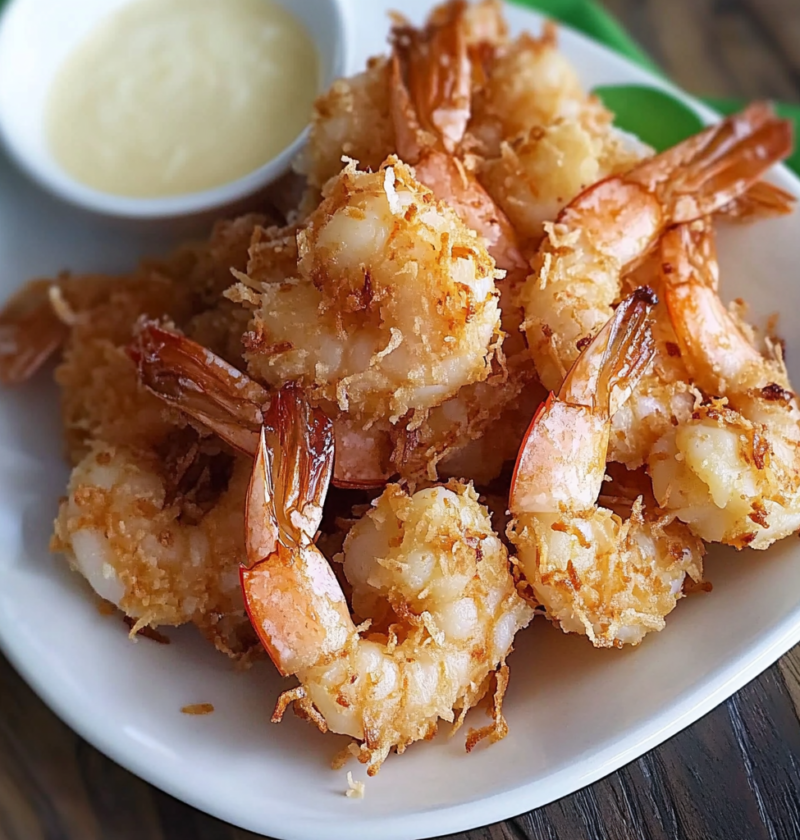
Crispy coconut shrimp delivers a satisfying crunch with sweet coconut flakes and tender shrimp in every bite. This popular appetizer transforms simple seafood into an elegant tropical treat perfect for gatherings.
You will love how the batter adheres to the shrimp while the coconut adds a textural contrast that melts on the tongue.
| Detail | Information |
|---|---|
| Prep Time | 20 minutes |
| Cook Time | 10 minutes |
| Total Time | 30 minutes |
| Servings | 4 servings |
| Difficulty | Medium |
| Cuisine | Asian Inspired |
| Category | Appetizer |
| Method | Frying |
Why This Recipe Works
This recipe works because it balances the sweet crunch of coconut with the savory flavor of the shrimp perfectly. I have developed this method over years of testing to ensure the coating stays attached during frying.
The batter acts as a glue that holds the coconut flakes firmly to the shrimp without becoming soggy in the oil. Using divided flour helps create a dry coating stage that protects the shrimp from direct heat.
Chilling the coated shrimp before frying solidifies the egg and batter, preventing the coating from sliding off in the oil. This simple step ensures a professional texture in every single piece.
Chef Tips for Perfect Results
Following these expert tips will guarantee a golden brown exterior and juicy interior every time.
Common Mistakes to Avoid
Avoid these common pitfalls to ensure your seafood appetizer turns out restaurant-quality.
| Mistake | Why It Happens | How to Fix It |
|---|---|---|
| Soggy Coating | Oil is not hot enough | Use a thermometer to verify 350 degrees before frying. |
| Shrimp Slip Offs | Batter is too thin | Squeeze excess liquid off the batter before dipping. |
| Burnt Coconut | Burning due to high heat | Reduce heat to medium and check the color constantly. |
| Raw Center | Overcrowding the pan | Fry in smaller batches to maintain oil temperature. |
| Breaded Clumps | Coconut not pressed down | Press the coating firmly onto the shrimp by hand. |
| Limp Texture | Standing on paper towels | Use a wire rack to allow airflow underneath for crispness. |
Variations and Substitutions
While the classic combination is delicious, you can customize this dish to fit different dietary needs.
| Ingredient or Element | Substitution or Variation | Impact on Flavor or Texture |
|---|---|---|
| Regular Flour | Gluten-free flour blend | Maintains texture for those with sensitivities. |
| Large Shrimp | Jumbo or Gulf Shrimp | Increases the meaty bite and portion size. |
| Sweetened Coconut | Unsweetened shredded coconut | Reduces overall sweetness for a savory profile. |
| All-Purpose Flour | Cornstarch dusting | Creates an extra crispy and light coating. |
| Large Egg | Vegan egg substitute | Makes the recipe suitable for vegans with similar binding. |
| White Flour | Whole wheat flour | Adds a nutty flavor and increases fiber content. |
| Frying Oil | Air Fryer method | Reduces oil usage significantly for a lighter dish. |
| Standard Batter | Panko breadcrumbs | Provides a lighter crunch and golden texture. |
| Traditional Beer | Non-alcoholic lager | Preserves the flavor profile without alcohol content. |
Serving Suggestions and Pairings
Serve this appetizer alongside cool, refreshing sides to balance the rich fried flavors.
- Dipping Sauce: Serve with sweet chili sauce or tartar sauce for a creamy contrast.
- Salad: Pair with a fresh mango salad or cabbage slaw for a crunchy, fresh element.
- Vegetable Sides: Steamed broccoli or green beans complement the savory shrimp well.
- Bread: Garlic bread or dinner rolls help soak up any extra sauces or juices.
- Rice: A side of jasmine rice is perfect for a slightly larger meal portion.
- Drink Pairing: Sparkling water with lime or a non-alcoholic ginger beer works best.
- Spice Level: Add a pinch of cayenne to the flour for a mild kick.
- Garnish: Fresh cilantro or lime wedges add a pop of green and brightness.
- Occasion: Ideal for summer parties, beach gatherings, or casual Friday nights.
Imagine arranging these golden shrimp on a large platter with bowls of dipping sauces for a striking presentation. Guests will be impressed by the tropical appearance and the delicious crunch that defines this dish.
Make Ahead Options
You can prepare most components up to 24 hours in advance to simplify your cooking schedule.
Coat the shrimp and place them on the baking sheet covered with plastic wrap in the refrigerator. The coating will hold up well for this duration without drying out or losing adhesion. Just remember to take them out of the fridge 15 minutes before cooking to allow them to come to room temperature.
Do not fry them until you are ready to serve, but having the prep work done ahead ensures a stress-free entertaining experience.
Storage and Reheating
Proper storage is essential to maintain the texture and safety of the seafood.
| Method | Duration | Instructions |
|---|---|---|
| Room Temperature | 2 hours | Leave out on a plate covered loosely during serving. |
| Refrigerator | 3 days | Store in an airtight container with paper towels to absorb moisture. |
| Freezer | 2 months | Freeze on a baking sheet before transferring to a freezer bag. |
| Reheating | 350 degrees for 10 minutes | Use an oven or air fryer to restore crispness. |
| Make Ahead | 24 hours | Keep raw coated shrimp chilled until ready to fry. |
Nutritional Information
Approximate values are based on one serving and may vary depending on exact ingredients and portion size.
| Nutrient | Amount per Serving |
|---|---|
| Calories | 350 |
| Protein | 28 grams |
| Fat | 18 grams |
| Saturated Fat | 9 grams |
| Carbohydrates | 22 grams |
| Fiber | 3 grams |
| Sugar | 5 grams |
| Sodium | 600 mg |
Frequently Asked Questions
Here are answers to common questions about preparing this dish.
Can I substitute the beer in the batter?
Yes, you can replace alcoholic beer with non-alcoholic beer or club soda for a similar carbonation effect. This ensures the batter rises nicely without introducing alcohol to the dish. The texture remains crisp and light regardless of the liquid choice.
How do I know when the shrimp are fully cooked?
The shrimp are done when the coating is golden brown and the internal shrimp meat is opaque and firm. Overcooking can make the shrimp tough and rubbery, so monitor them closely in the oil. The oil temperature should stay consistent throughout the process.
Why is my coconut coating falling off?
This often happens if the shrimp are wet or the batter is too thin before dipping. Ensure you dredge the shrimp in dry flour first to create a sticky surface for the wet batter. Press the coconut flakes firmly into the wet batter layer.
Can I freeze these coconut shrimp for later?
Yes, you can freeze them either raw or cooked, but raw is better for texture retention. Flash freeze them on a tray before bagging to prevent them from clumping together. Fry frozen shrimp directly in hot oil without thawing first.
What dipping sauce pairs best with coconut shrimp?
Thai sweet chili sauce offers a perfect balance of sweet and spicy flavors that complements the coconut. A creamy curry sauce or tartar sauce also works wonderfully with the fried batter. Try a pineapple salsa for a fruity twist.
How long can leftovers be stored in the fridge?
Leftovers should be consumed within three days for optimal safety and quality. Store them in an airtight container to prevent the coating from absorbing moisture from the fridge air. Reheat in an oven to maintain the crispy texture before eating.
Conclusion
Coconut shrimp is a versatile appetizer that combines crispy texture with sweet and savory flavors. This recipe provides a reliable method for achieving restaurant-quality results at home. We hope you enjoy making this delicious dish for your next family gathering.
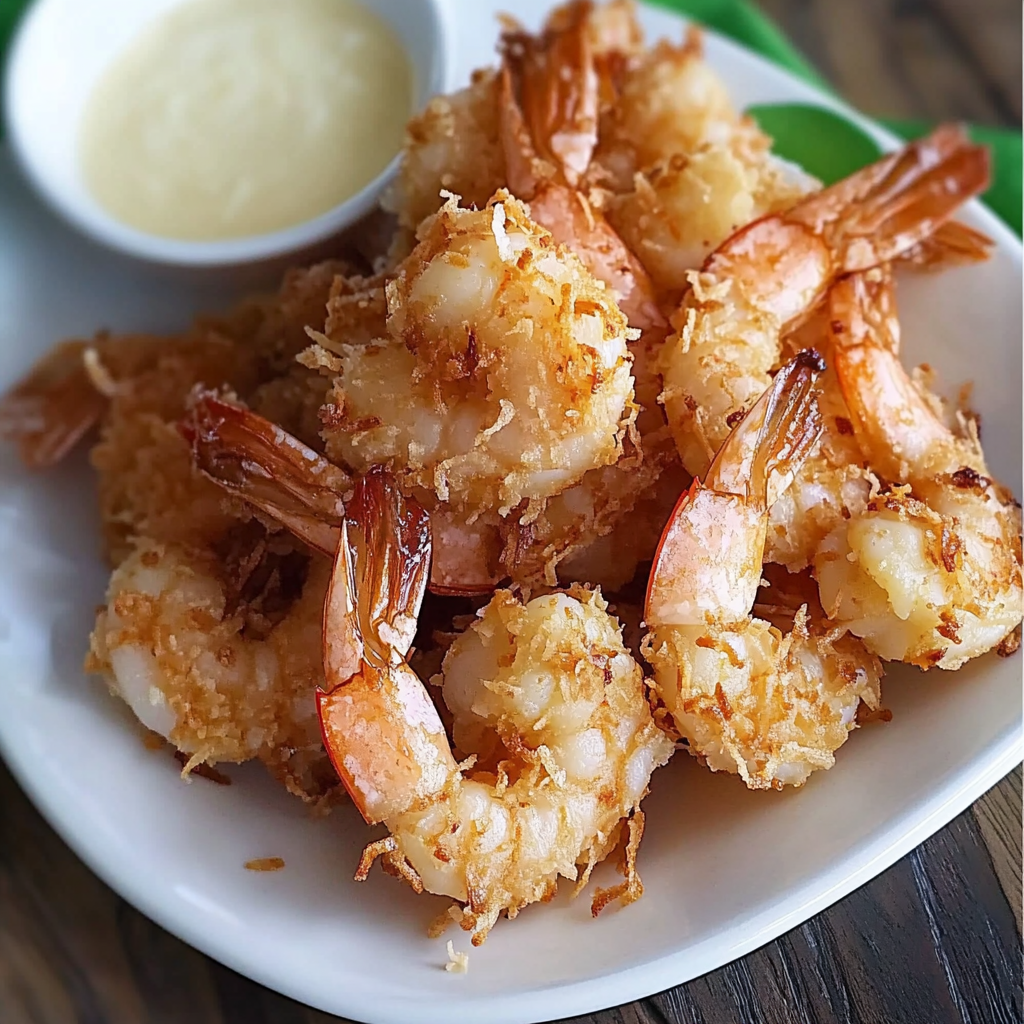
Crispy Coconut Shrimp Recipe for Seafood Lovers
Ingredients
Method
- Pat shrimp dry with paper towels.
- In a bowl, mix flour, baking powder, salt, and pepper.
- Whisk eggs with non-alcoholic beer until light.
- Dip shrimp in flour mixture, shaking off excess.
- Coat immediately in egg batter, shaking off drips.
- Press coconut flakes evenly onto each shrimp.
- Chill coated shrimp for 10 minutes.
- Heat oil in a skillet to 325°F (160°C). Fry shrimp in batches, 1-2 minutes per side, until golden brown.
- Drain on paper towels.
Nutrition
Notes
Maintain oil temperature between 300-350°F (150-180°C) for even frying.
Use non-alcoholic beer as a carbonated alternative to traditional beer.
For extra crispiness, double-coat shrimp and chill again before frying.